
Air conditioning fixing should preferably be achieved by an experienced professional. However, if you’re content working with HVAC apparatus and electricity, it is possible to do it yourself. Air conditioning installation is time overwhelming and necessitates that you follow several steps so that the unit works properly and competently.
Locate the Indoor Unit
With an indoor air conditioning unit, the placing of the unit is significant for a good air conditioning installation. There should be no pipes around, good air movement and the unit should not close to any doorways. For an appropriate air conditioning installation, furniture should not obscure the front vents of the unit.
Select an unobstructed location on your interior wall to mount the indoor unit.
You'll need to cut a hole through the wall to feed the pipes from the indoor unit to the outdoor unit, so make sure the location you choose will allow you to do so. Select a spot away from direct sunlight and heat causes for the best results. Mount the unit 7 feet (2.1 m) off the floor and ensure there’s at least 6–12 inches (15–30 cm) of open space on every side of the unit to allow for proper airflow.
- Choose a location with hoops to ensure the wall is strong enough to hold the weight of the unit.
- Install the unit at least 3.3 feet (1.0 m) away from feelers and power or connecting lines that are used for television, radio, home security systems, intercoms, or telephones. The electrical noise from these sources could cause operational problems for your air conditioner.
- Evade locations where gas may leak or where oil mist or sulfur exists.
- Most of these units have remote controls so that you can effortlessly turn them on or off and adjust the temperature even if they’re mounted high on the wall.
Tip: Choose a central location for the indoor unit where the cool air can simply drift through your home, such as in the living room.
Secure the mounting plate to the interior wall.
Grip the mounting plate against the wall where you want to install the indoor unit. Use a level to make sure it is both horizontally and vertically level. Use a pencil to mark the locations of the screw holes, remove the plate, then drill a hole into the wall where each screw will go.
- Position the plate so it matches up with the holes, insert plastic anchors into the holes, and secure the plate to the wall with tapping screws.
Drill a 3 in (7.6 cm) hole through the wall so you can feed the pipes outside. Make a mark in the center of the hole in the rising plate. Use a keyhole saw or a drill with a hole-cutting accessory to create a circular 3 in (7.6 cm) opening through the wall that slopes somewhat downward toward the ground to safeguard adequate drainage.
Make sure there are no pipes or wires overdue the wall before drilling or cutting the hole.
Check the electrical connections on the indoor unit. Lift the A/C unit’s front panel and remove the cover. Make sure the cable wires are linked to the screw terminals and that the wiring matches the diagram that came with the unit.
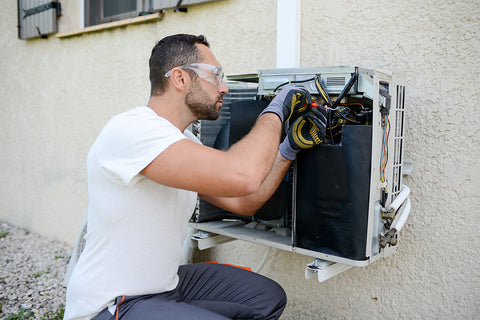
The Outdoor Unit
In an outdoor setting, make sure that the unit is sheltered from the worst part of the sun. It’s made to be watertight but some covering from the sun will help it operate more competently. The large fan needs to be facing away from the house.
As with indoor units, there needs to be passable space around the unit. If copper tubing is coiled at the back of the unit, it shouldn’t comprise any airflow to the front of the unit. The base on which the unit is connected needs to be flat and secure. If the unit is being straddled on a roof, it needs to be on wood so it can’t perhaps be blown over the side in the event of very heavy wind.
Bend Copper Pipe
With an indoor unit, the water sewer pipe can be at either end of the drip tray. Simply make sure the rubber bung is in the hole at the other end. When you install your water run-off, make sure it’s angled down through the wall and runs a good distance from the house because the unit can put out 4 pints of water a day during the hottest part of the summer.
Pipe Connection
When connecting the pipes to the unit during an air conditioning installation, put a tiny drop of oil on all of the finishes first. Next, assign the pipes to the nerve pinecones and constrict them with two wrenches. Be careful not to overtighten.
The copper pipes need to be covered with foam insulation and you should put foam over all the connecting parts. Make sure no refrigerant is dripping from any of the connectors when you start the unit. When ejecting air from the unit, be convinced you follow the timings in the company’s commands.
The Arrival of the Install Team, Review, and Safety
Before your installation team reaches, you should obtain a call or text letting you know they’re on their way.
Many good HVAC Companies will also send pictures accompanied by bios of the installation team that will be occupied at your home ahead of time. This is an added safety and coziness factor before a stranger enters your home.
Once they arrive, the chief installer will share and review the job information with you. This is often composed in a packet that includes details of the job. This packet contains the apparatus information, fixtures to be installed, and any special commands given by you to the estimator before the sale.
It’s significant to allow a few moments for this review. This will avoid costly and annoying mistakes from happening during the installation. Communication is a key constituent to an effective installation.
While you are studying the job details with the lead installer, the other member(s) on the team will use this time to start laying down floor protection and getting tools and gear in place. They will also start a safety process that includes turning off electrical circuits and gas supply to the existing HVAC tackle.


